Manual


Multiwavelength Data Viewer for 2nd Generation Instrument

The Multiwavelength Data Viewer is used to import, display and export ASCII and binary multiwavelength data from the second generation multiwavelength optics developed at the Max Planck Institute for Colloids and Interfaces in Golm, Germany, by Helmut Cölfen's group. The viewer is started by clicking on "View/Edit Multiwavelength Data" in the Edit sub-menu of the main menu, loading up the viewer.

Process:

  1. Loading Data First, you need to load experimental data. This can be accomplished in one of two ways: 1. loading ASCII data as generated by the ultracentrifuge, and 2. by loading a previously saved binary representation of the data. Simply select "Load Binary Data" or "Load ASCII Data" before clicking on "Load MWL Data". Before loading, you also need to specify the cell and channel from which you want to load data. This will reduce the number of files shown in the file dialogue. After navigating to the data directory, you can select multiple files for loading. While the data loads, the status bar and the information label keep you posted about the progress of the loading. Keep in mind that loading large data sets from ASCII formatted data is very inefficient and may take a long time.

    Once data are loaded, the parameter controls will be reset to reflect the data's properties, indicating limits for wavelength, radius and time. You are now ready to process the data by various means.

  2. Saving Data to binary format: To save the data by making a binary copy, which loads much quicker than the ASCII formatted representation. The information will be identical to the ASCII formatted version and can be reloaded by clicking on "Load Binary Data" and "Load MWL Data". Note: Specify "Intensity Mode" or "Absorbance Mode" before saving since this information is incorporated into the binary representation for future data analysis.

  3. Exporting data: Use this function to export the data to an ASCII formatted representation compatible with the traditional XLA formatted radial and wavelength files. Select the limits for wavelength, radius and number of time points before clicking on "Export ASCII". To export wavelength data, select "Plot Wavelength", to export radial data, select "Plot Radius".

  4. Movies: You can display three different movies of the data. All movies will only show the data specified by the limit counters for wavelength, radius and time. You can crop any subset of data by changing the limits to the desired range.

    1. Viewing a radial scan and observing the change of the radial profile over the wavelength domain: Select "Plot Radius", "2-Dimensions" and "Movie".
    2. Viewing a wavelength scan and observing the change of the wavelength profile over the radial domain: Select "Plot Wavelength", "2-Dimensions" and "Movie".
    3. Viewing a movie of a 3-dimensional surface plot, showing the simultaneous change of absorbance over the radial and wavelength domains. Select "3-Dimensions" and "Movie". To speed up the display of movie slides it helps to reduce the number of wavelengths scans by averaging multiple wavelengths into one. For acquisitions generated with the 2048 CCD array, it helps to average 7-12 wavelength scans. Besides speeding up the display, the image will also appear smoother because of the averaging. Depending on the size of your display resolution may not be gained by not averaging any wavelength scans because not enough pixels are dedicated to the screen to show all individual points anyway, hence use of the averaging feature greatly enhances movie rendition.

    4. Saving movies to an mpg file: All movie frames can be saved to individual PNG image files by selecting "Save Movie Frames to PNG Images". The images are saved to separate directories to facilitate processing image files later on. You will be prompted to either create or select an existing directory for outputting the image files if you select this option before the movie is shown. A string of image files can later be assembled into an mpeg movie. Under Linux, such a task can be accomplished like this (encoding into DVD/mpeg2 format):

      
      mogrify -format jpg *.png
      mencoder mf://*.jpg -mf fps=10:type=jpg -o 3d-movie.mpg -ovc lavc -lavcopts vcodec=mpeg2video:vbitrate=1800
      

      These commands will convert png images to jpg images, and assemble them from a 3D-surface image sequence into an mpeg movie of original scale. The command will use a 10 fps frame rate for the movie, use no interlacing, and assemble the images into a movie file called "3d-movie.mpg".

      Another way to encode jpg images is using ffmpeg and converting into mp4 format:

      ffmpeg -i %03d.jpg -sameq 3d-movie.mp4
      
      Please note that the images should be sequentially named 001.jpg, 002.jpg, etc... for this command to work.

      For playback, use mplayer or xine. To slow the movie down, you can use:

      mplayer -fps 10 wavelength.mpg
      
      This would slow the movie down to 10 frames per second.

  5. Printing plots: All plots can be exported to either postscript or bitmap image, 2-dimensional plots can be sent to the printer with the "Print" function. 3-dimensional plots need to be exported to a postscript rendition before being printed to a printer by commandline tools.

  6. Updating plots: Clicking the function called "Update Plot" will apply currently selected parameters to either a 2-dimensional radial plot, a 2-dimensional wavelength plot,or a 3-dimensional surface plot. The 3-dimensional data viewer from UltraScan is based on the 3D plotting library QWTPLOT3D by Micha Bieber and allows for detailed manipulation of the 3-dimensional image.

Functions:

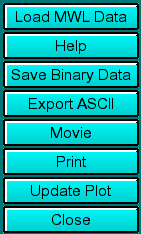
Click on these buttons to control the multiwavelength viewer functions:
  • Load MWL Data: Load ASCII or binary multiwavelength data as descrbed above under (1).
  • Help: View this help file
  • Save Binary Data: Write out a copy of all data to a binary representation for faster loading as explained above under (3). This data will be an exact copy of the original ASCII data, and not be affected by the selected limits.
  • Export ASCII: Exporting data to XLA/Beckman-formatted ASCII files as explained above under (4)
  • Movie: Display movies of data as explained above under (5)
  • Print Data: Printing of plot graphics as explained above under (6)
  • Update Plot: Update 2-dimensional or 3-dimensional plot graphics according to the selected limits as explained above under (7)
  • Close: Close this program

Controls 1:

The binary/ASCII load descriptor control if binary or ASCII source data are loaded. Both contain the same information, but binary data needs to be saved first. The next item selects what information is displayed in the 2-D plots or processed in the movies. The option is for wavelength vs. radius plots ("Plot Wavelength)are shown or radius vs. wavelengths plots ("Plot Radius). The next item controls if updates or movies apply to a 2-dimensional representation or a 3-dimensional representation. The data mode (Intensity vs. Absorbance mode) determines the control flag written to the binary data (which is not contained in the ASCII data). Clicking on "Save Movie Frames to PNG Images" allows you to save all frames of a movie to individual PNG images. See above descriptions for items 1-7 for further details.

Controls 2:

These controls determine the limits for the wavelength, radius, and time displayed or processed by the multiwavelength viewer. The Lambda average setting determines how many wavelength scans are combined by averaging when displaying 3-D surface profiles of the data. See above descriptions for items 1-7 for additional details.


www contact: Borries Demeler

This document is part of the UltraScan Software Documentation distribution.
Copyright © notice.

The latest version of this document can always be found at:

    http://www.ultrascan.uthscsa.edu

Last modified on January 10, 2006.