
|
Manual
|
Experimental Data Record Entry:
Use this function to commit experimental data to the database. This
function allows you to associate experimentally acquired data with buffer
information, peptide and nucleotide sequence information, investigator
contact information, and the date of the experiment in a relational
database.
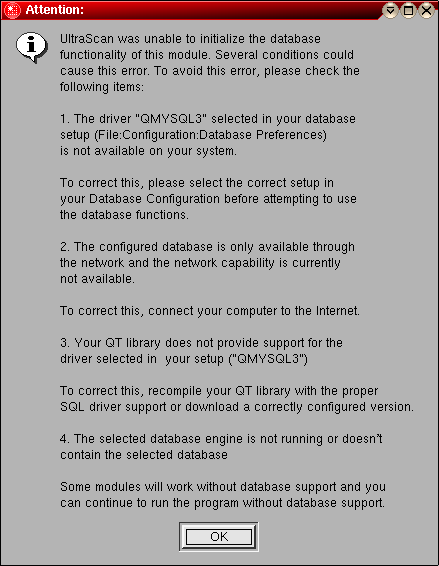
Note: This program will utilize the database backend of
UltraScan. This functionality allows you to save certain
files and data in a database, among them the nucleotide files analyzed
with this module. If the database system is not supported or available
on your system, you will get a warning message
when opening this module.
Entering experimental data to the relational database is a multistep process.
This process is explained in detail below.
Explanation of fields and buttons:
|
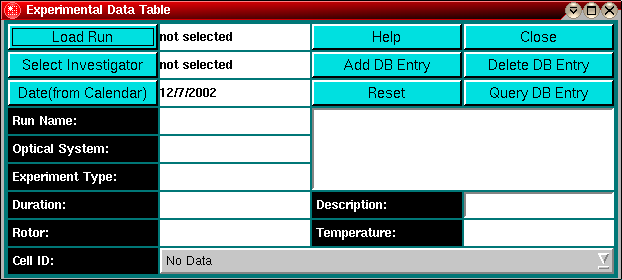
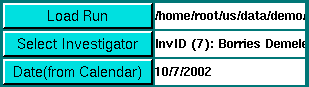
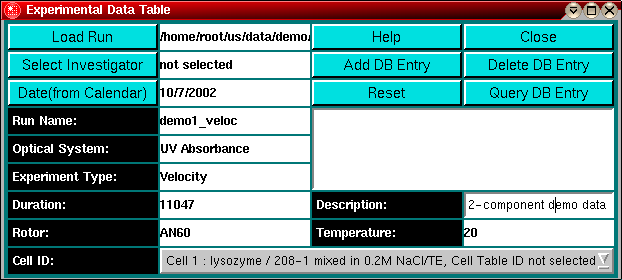
Load Run: Use this function to load the run selection panel
Select Investigator: Clicking on this button will invoke the
investigator selection panel.
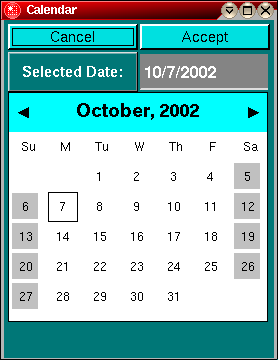
Date (from Calendar): Load a calendar to select
the date at which the experimental data was collected.
|
|
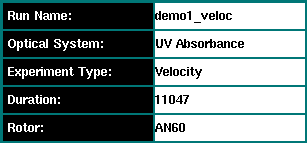
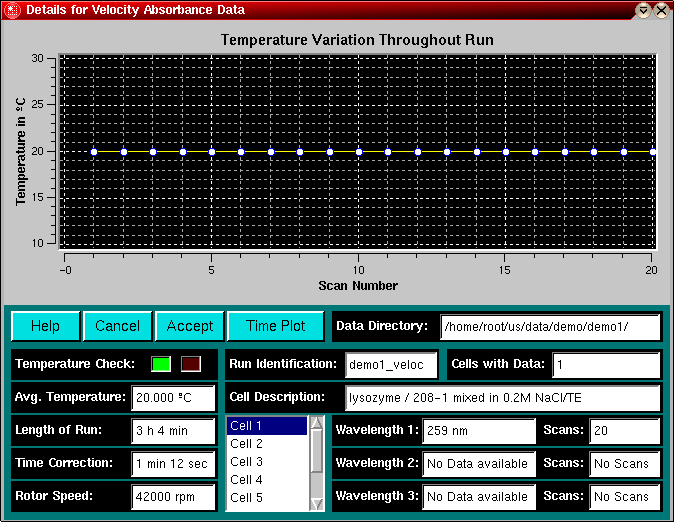
Run Name: The Run ID entered in the Run Details Window
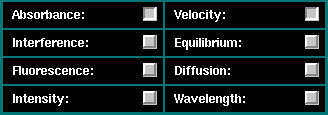
Optical System: The optical system selected in the
Data Review Window
Experiment Type: The experimental data type selected in the run selection panel
Duration: The duration of the experiment in seconds
Rotor: The rotor used in the experiment
|
|
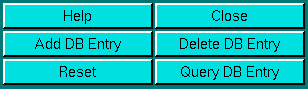
Help: Display this help file
Close: Close this database utility window and exit
Add DB Entry: Add a new experimental data record to the database
Delete DB Entry: Delete the selected experimental data record from the database.
This function requires administrator privileges.
Reset: Reset the database browser window and clear all fields
Query DB Entry: Search the database for all database entries (this could
take a long time on a slow link)
|
|
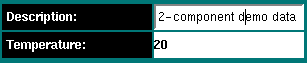
Description: The description of the experiment - enter a few words describing the
experiment (this is different from the run ID and can include spaces).
Temperature: The average temperature of the experiment
|

|
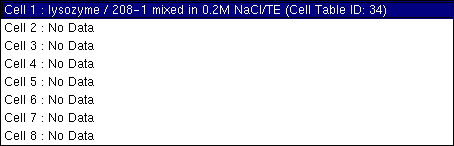
This listbox shows the cell descriptions for each individual cell contained in the
experiment.
|
Experimental Data Entry:
The following procedure describes how to add an experimental data entry
to the UltraScan database. This is a multistep process
that allows you to associate related data with the experimental data,
such as buffer information, peptide and nucleotide sequences, as well as
investigator information. All associated data has to be entered into this
database as well (you can find more information on how to add ancillary
data to the database here):
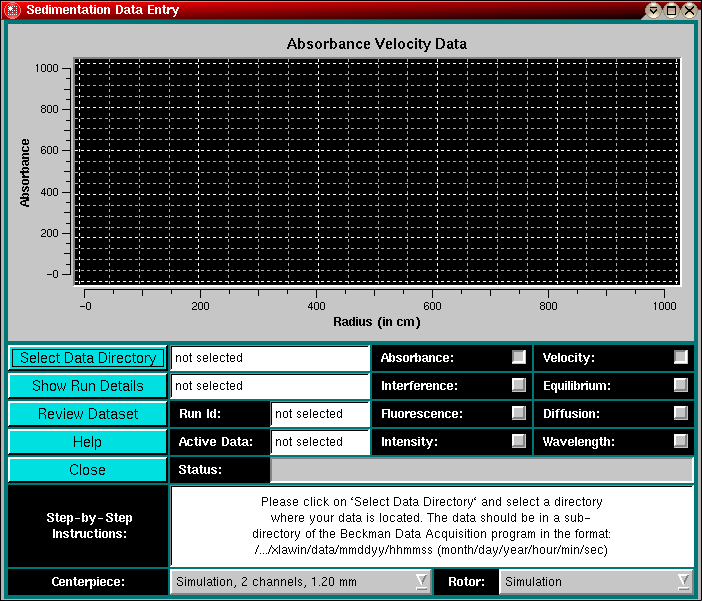
- The first step requires that you load the experimental data review window by
clicking on the "Load Run" button. After opening the experimental data window, you need to load a run,
similar to the procedure when editing data. First, select the correct
combination of optical system and experimental data type by clicking on
the respective checkboxes on the dialog below:
- After selecting the correct optical system and experimental
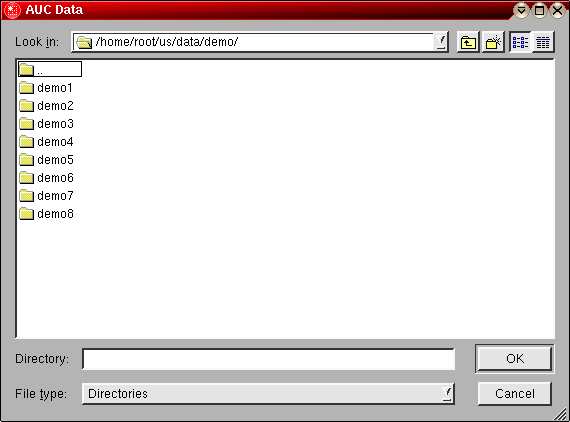
data type, you can select data after clicking on the "Select
Data Directory" button. This will open a file
dialog which allows you to navigate to the directory containing
the desired run. The program expects you to select a directory,
not a selection of files for a particular cell or group of cells. All
files part of a directory are considered a "Run".
- After selecting a directory, the data details
window will open and you will have to enter a run identification. This
run identification will be the name used to identify the entire
experiment. After entering the new run identification click on the
"Accept" button.
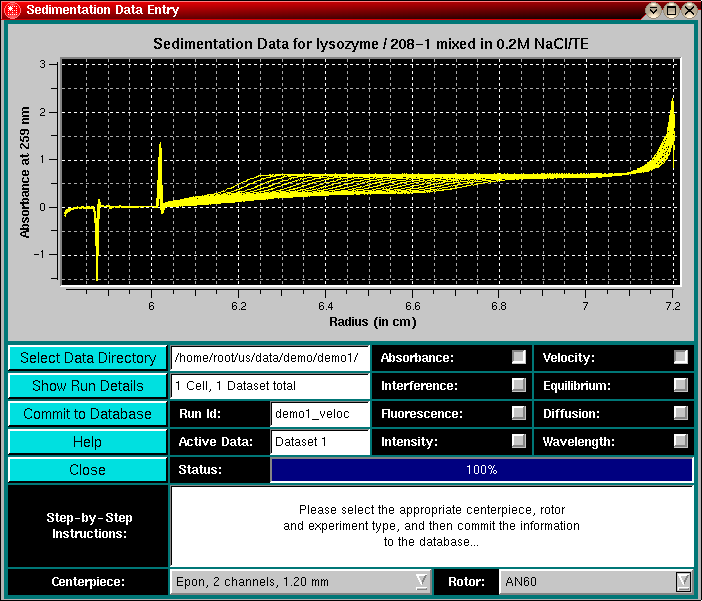
- Next, you will be returned to the experimental
data review window Click on
 to review the
first cell of the selected data. The first cell of the experiment will
be displayed in the experimental data window.
to review the
first cell of the selected data. The first cell of the experiment will
be displayed in the experimental data window.
- Select the correct centerpiece
and rotor settings. If there are multiple cells in the experiment, click on
 to review the next cell. Continue to confirm
centerpiece settings until each cell has been reviewed.
to review the next cell. Continue to confirm
centerpiece settings until each cell has been reviewed.
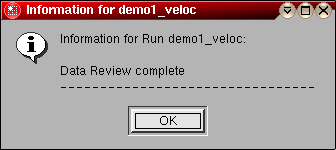
- Next, click on
 to enter the data into the
database. A message will indicate that the
data review is complete, and the experimental
data review window will close and you will be returned to the experimental data entry window, which now shows
updated fields for the selected data.
to enter the data into the
database. A message will indicate that the
data review is complete, and the experimental
data review window will close and you will be returned to the experimental data entry window, which now shows
updated fields for the selected data.
- Before proceeding, you need to select
an investigator by clicking on
 , confirm the date
(you can select a date from the
calendar widget), and enter a verbose description of the experiment
in the "Description" field.
, confirm the date
(you can select a date from the
calendar widget), and enter a verbose description of the experiment
in the "Description" field.
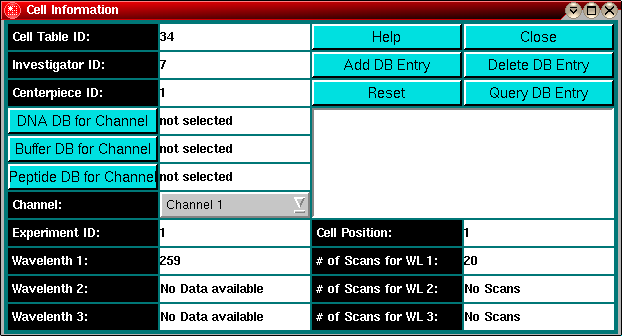
- Before committing the data to the database, you will need to enter
the cell information for each cell. You will be able to associate
nucleotide, buffer and peptide information for each channel of each cell
with the cell database entry form. To open this
form, you need to click on the cell listbox
and double click on the cell for which you want to provide the associated
data. You will have to select each cell containing data that is listed
in the cell listbox before you can commit
the experimental dataset to the database. The process of adding related
cell information is described here.
Note: If you haven't selected the investigator, you will
be reminded with an error message.
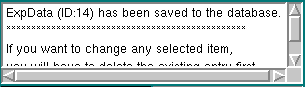
- After completing all related cell information, you can click on
 to complete the database entry. Once the data
was successfully uploaded, the message window will
be updated and confirm the successful upload of the data.
to complete the database entry. Once the data
was successfully uploaded, the message window will
be updated and confirm the successful upload of the data.
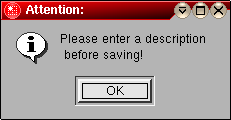
Note: If you haven't entered a run description, you will
be reminded with an error message.
www contact: Borries Demeler
This document is part of the UltraScan Software
Documentation distribution.
Copyright © notice
The latest version of this document can always be found at:
http://www.ultrascan.uthscsa.edu
Last modified on January 12, 2003.